Recent Posts
The Aftermath of Water Damage: Handling Mold and Mildew Like a Pro with SERVPRO®
3/12/2025 (Permalink)
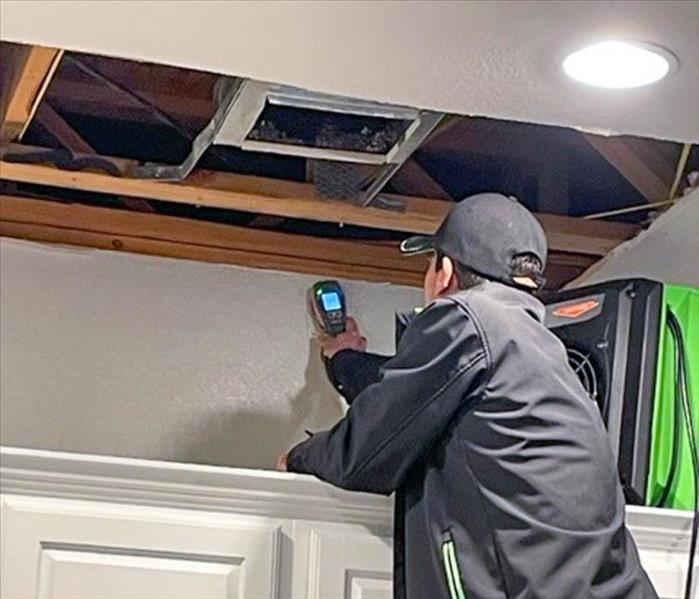 Water damage is never just about the initial flooding or leaks—it’s also about what comes after.
Water damage is never just about the initial flooding or leaks—it’s also about what comes after. One of the biggest concerns following water damage is the rapid growth of mold and mildew. These unwelcome guests can take hold in as little as 24 to 48 hours after water exposure, making swift action critical.
At SERVPRO®, we understand how overwhelming it can be to deal with water damage and its aftermath. That’s why we’ve put together this expert guide on how to handle mold and mildew after water damage, so you can protect your home, belongings, and structure effectively.
Why Mold and Mildew Are a Concern After Water Damage
Mold and mildew thrive in damp environments, and water damage provides the perfect conditions for growth. When moisture lingers in walls, floors, carpets, and even furniture, mold spores can settle in and begin spreading. If left untreated, mold can affect structural materials, causing deterioration over time.
Common Causes of Mold and Mildew Growth After Water Damage
- Lingering Moisture – Even after visible water is removed, high humidity and trapped moisture can promote mold growth.
- Porous Materials – Drywall, wood, insulation, and carpets absorb water quickly, creating an ideal environment for mold and mildew.
- Poor Ventilation – Without proper airflow, moisture remains trapped in affected areas, allowing mold to spread faster.
- Delayed Cleanup – The longer water-damaged areas remain untreated, the greater the risk of mold development.
How to Handle Mold and Mildew After Water Damage
The key to stopping mold and mildew in their tracks is quick and thorough action. Follow these steps to ensure effective cleanup and prevention.
1. Remove Excess Water Immediately
Start by extracting standing water as soon as possible. Use a wet/dry vacuum, mops, or towels to soak up excess moisture. The longer the water sits, the more likely mold will take hold.
2. Dry Affected Areas Thoroughly
Drying is one of the most crucial steps in preventing mold growth. Here’s how to do it effectively:
- Use air movers and fans to increase airflow in the affected areas.
- Set up dehumidifiers to pull moisture out of the air and surrounding materials.
- Open windows and doors (if weather permits) to improve ventilation.
- Remove damp items like rugs, upholstery, and curtains for separate drying or disposal if necessary.
3. Inspect for Mold Growth
Once the area has dried, check for signs of mold and mildew. Look for:
- Discoloration on walls, ceilings, and flooring
- A musty or damp odor
- Warping or peeling paint and wallpaper
If you notice any of these signs, deeper remediation may be required.
4. Clean and Disinfect Affected Surfaces
Even if mold isn’t visible, it’s best to treat water-damaged areas with a professional-grade cleaning solution to prevent spores from spreading. SERVPRO uses industry-approved cleaning and sanitizing methods to ensure thorough remediation.
5. Remove and Replace Severely Damaged Materials
Some materials may be too damaged to salvage, such as soaked drywall, insulation, or carpeting. In these cases, replacing them is the best way to prevent future mold issues.
6. Address the Source of Water Damage
To prevent mold from returning, identify and fix the root cause of the water damage. This may include:
- Repairing leaks in plumbing or appliances
- Sealing cracks in the foundation or walls
- Improving drainage around the property
- Inspecting and maintaining roofing and gutters
7. Call SERVPRO for Professional Restoration
While DIY cleanup is possible for minor water damage, severe or widespread issues require professional expertise. SERVPRO specializes in water damage restoration, mold prevention, and remediation, ensuring your property is thoroughly dried and treated.
FAQs: Handling Mold and Mildew After Water Damage
Q: How long does it take for mold to grow after water damage?
A: Mold can start growing within 24 to 48 hours after water exposure, making fast action essential.
Q: Can I clean mold myself, or do I need professional help?
A: Small, surface-level mold spots can sometimes be cleaned with the right techniques. However, widespread mold or moisture trapped in walls, flooring, and ceilings should be handled by SERVPRO professionals to ensure complete removal.
Q: Will running a dehumidifier prevent mold after water damage?
A: Yes, using a dehumidifier helps reduce moisture levels, making it harder for mold to grow. However, it should be used in combination with proper drying techniques and inspections.
Q: What materials are most susceptible to mold growth after water damage?
A: Porous materials like drywall, wood, insulation, carpeting, and upholstery are highly vulnerable to mold growth.
Q: How does SERVPRO help with mold prevention after water damage?
A: SERVPRO provides complete water damage restoration services, including advanced drying methods, moisture detection, and mold prevention solutions to ensure your home or business is fully restored.
Let SERVPRO Handle Your Water Damage and Mold Concerns
Dealing with water damage is stressful, and the last thing you need is mold complicates the restoration process. At SERVPRO, we have the experience, tools, and techniques to handle water damage effectively and prevent mold growth before it becomes a bigger issue.
If you’re facing water damage and want to ensure your home is properly dried and restored, contact SERVPRO today. Our experts are ready to help, providing fast and reliable service to get your property back to normal.
The Benefits of Having a Fire Safety Consultant for Your Business: Expert Insights from SERVPRO
12/18/2024 (Permalink)
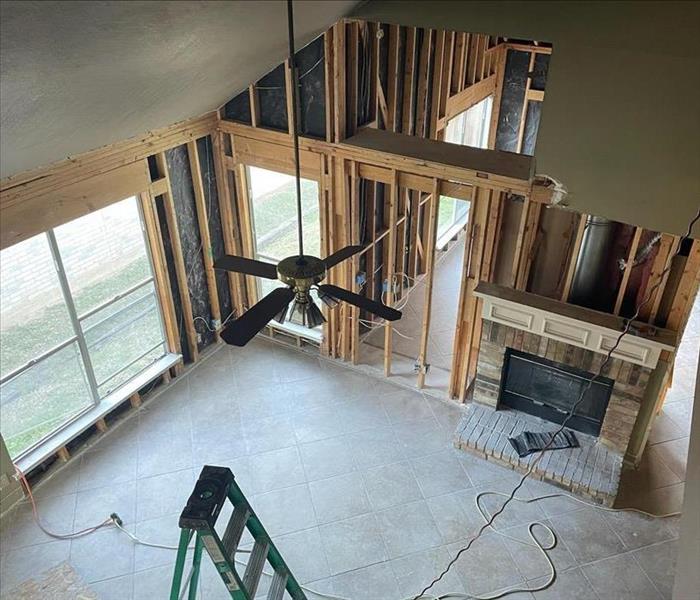 Explore the benefits of having a fire safety consultant for your business and how SERVPRO® can support your fire safety initiatives.
Fire safety is a vital aspect of any business’s operational strategy. Whether you run a small office or a large commercial facility, being proactive about fire prevention and safety compliance can save lives, protect property, and minimize costly downtime. One of the most effective ways to ensure your business is prepared is by hiring a fire safety consultant. These experts specialize in assessing risks, implementing safety measures, and ensuring compliance with fire safety codes.
In this blog, we’ll explore the benefits of having a fire safety consultant for your business and how SERVPRO® can support your fire safety initiatives.
What Does a Fire Safety Consultant Do?
A fire safety consultant provides specialized knowledge and expertise to help businesses assess fire risks, develop safety protocols, and ensure compliance with local, state, and federal fire regulations. Their role is to guide businesses through fire prevention strategies, emergency planning, and ongoing maintenance of fire protection systems.
Here are some of the core tasks a fire safety consultant typically handles:
- Risk assessments: Identifying fire hazards within your building or facility.
- Fire safety planning: Developing customized fire safety plans, including evacuation routes and emergency procedures.
- Code compliance: Ensuring your business adheres to relevant fire codes and safety regulations.
- Training: Offering training sessions to staff on fire safety protocols, fire extinguisher use, and evacuation procedures.
- System inspections: Checking fire alarms, sprinkler systems, and extinguishers to ensure they are fully operational.
By bringing in a fire safety consultant, you get the peace of mind that your business is not only compliant with regulations but also equipped with the latest safety practices.
The Benefits of Hiring a Fire Safety Consultant
The decision to hire a fire safety consultant can make a significant difference in the protection and safety of your business. Below are the key benefits that a consultant provides.
1. Expert Guidance on Fire Codes and Regulations
Fire safety regulations can be complex and change frequently. A fire safety consultant stays up to date with the latest fire codes and standards, ensuring your business remains compliant. This can prevent costly fines, reduce liability, and avoid disruptions in your business operations.
For example, according to the National Fire Protection Association (NFPA), compliance with fire codes is essential because fire departments in the U.S. respond to an average of 36,784 fires at industrial or manufacturing properties between 2017 and 2021. Fire safety consultants can help prevent your business from becoming a part of these statistics.
2. Comprehensive Risk Assessments
One of the most valuable services a fire safety consultant provides is a comprehensive risk assessment. This thorough evaluation identifies fire hazards specific to your business, from faulty electrical systems to improperly stored flammable materials. With this information, you can address risks proactively and reduce the likelihood of a fire.
3. Customized Fire Safety Plans
Every business is unique, which means your fire safety plan should be tailored to your specific needs. A fire safety consultant develops a custom fire safety plan that includes evacuation procedures, the location of fire extinguishers, and protocols for employees to follow in case of an emergency. This personalized approach ensures that all fire risks are mitigated according to the specifics of your building and business operations.
4. Staff Training and Preparedness
Even with the best fire safety systems in place, employees need to know how to respond during a fire emergency. Fire safety consultants provide training that equips your staff with the knowledge and skills necessary to evacuate safely and respond to fires quickly and effectively. Well-trained employees can make the difference between a minor incident and a major catastrophe.
5. Ongoing Fire Safety Maintenance and Support
A fire safety consultant doesn't just help you set up a fire prevention plan — they offer ongoing support to ensure that your fire protection systems are regularly inspected and maintained. This includes scheduling routine fire alarm tests, sprinkler system inspections, and ensuring that fire extinguishers are up to date.
Why Choose SERVPRO for Fire Safety Consulting?
SERVPRO offers comprehensive fire safety consulting services tailored to the unique needs of your business. Our experienced consultants work with you to assess risks, ensure compliance, and develop a customized fire safety plan. We combine our expertise in fire damage restoration with proactive safety measures to keep your business safe from the threat of fire.
Final Thoughts: Invest in Fire Safety to Protect Your Business
Hiring a fire safety consultant is a proactive step in safeguarding your business from potential fire risks. With expert guidance, customized plans, and ongoing support, a fire safety consultant ensures that your business is compliant with fire safety regulations and prepared for any emergency.
Partnering with SERVPRO for fire safety consulting gives you the expertise and assurance that your business is protected from fire hazards. Don’t wait for an emergency to act — contact our team today and take the necessary steps to protect your property, employees, and customers.
Mold in Commercial Kitchens: Expert Insights on Risks and Solutions from SERVPRO®
11/13/2024 (Permalink)
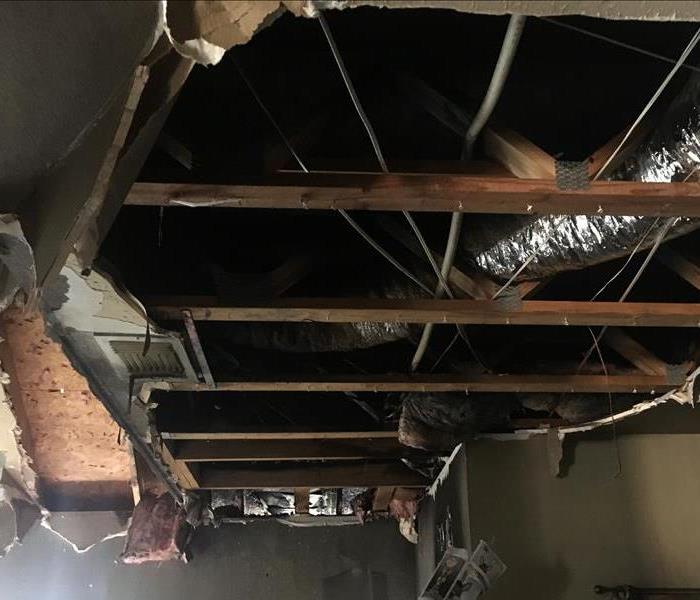 We dive into the key risks of mold growth in commercial kitchens and provide expert solutions to help you keep your kitchen clean and mold-free.
Mold in commercial kitchens in San Antonio, TX, is not only an inconvenience, but it also poses serious risks to the business's reputation and operational efficiency. Kitchens, especially commercial ones, often have the ideal conditions for mold to thrive: moisture, warmth, and food residues. To prevent disruptions and potential long-term damage, understanding the risks of mold in a commercial kitchen and learning how to prevent it is crucial.
In this blog, we’ll dive into the key risks of mold growth in commercial kitchens and provide expert solutions to help you keep your kitchen clean, safe, and mold-free.
The Prevalence of Mold in Commercial Kitchens
Mold can develop quickly in environments where moisture is abundant, and kitchens are particularly vulnerable due to regular water use, humidity, and food waste. According to a report from the International Association for Food Protection (IAFP), over 25% of food service establishments experience mold growth at some point. This statistic highlights the importance of mold prevention in commercial kitchens.
Risks of Mold in Commercial Kitchens
While mold in a commercial kitchen might seem like just a cleanliness issue, it can lead to serious risks that impact the business in multiple ways:
1. Damage to Equipment and Infrastructure
Mold can cause significant damage to kitchen equipment, ceilings, walls, and flooring. It grows in moist areas, so places like sink areas, under refrigeration units, and behind walls where pipes run are at higher risk. Over time, mold can deteriorate structural materials, requiring costly repairs or replacements.
2. Contamination of Food Supplies
One of the biggest risks of mold in a commercial kitchen is the potential for food contamination. Mold spores can easily spread through the air, and if they land on food preparation areas or equipment, there is a heightened risk of cross-contamination. This can result in wasted inventory, increased costs, and operational downtime.
3. Increased Operational Costs
Addressing mold once it has spread can lead to increased operational costs. The cleanup process can be time-consuming, require specialized equipment, and, in some cases, lead to the temporary closure of the kitchen. Regular mold inspections and prevention measures can help reduce these unexpected costs.
Expert Solutions for Mold Prevention in Commercial Kitchens
Preventing mold in commercial kitchens requires a combination of proactive maintenance, routine cleaning, and proper ventilation. Here are some expert solutions for keeping your kitchen mold-free:
1. Control Humidity Levels
High humidity is one of the main factors that contribute to mold growth. To combat this, install dehumidifiers or ensure proper ventilation, especially in areas where moisture tends to accumulate, such as near dishwashing stations or under refrigeration units. Keeping humidity levels below 60% is ideal for preventing mold growth.
2. Fix Leaks Immediately
Even small leaks can create the perfect environment for mold to thrive. Regularly inspect plumbing under sinks, around water fixtures, and near refrigeration units for signs of leaks. Addressing leaks as soon as they are detected will help prevent moisture from spreading to hidden areas.
3. Clean Hard-to-Reach Areas Regularly
Certain areas in commercial kitchens are more prone to mold growth due to limited access during routine cleaning. Areas behind equipment, under sinks, and ventilation ducts are some of the most common places where mold can grow unnoticed. Schedule deep cleaning sessions to ensure these areas are cleaned and inspected regularly.
4. Use Mold-Resistant Materials
When building or renovating a commercial kitchen, consider using mold-resistant materials, such as moisture-resistant drywall, mold-inhibiting paint, or stainless steel surfaces. These materials not only prevent mold growth but also make routine cleaning easier and more effective.
5. Implement a Regular Inspection Schedule
Regular inspections by professional mold remediation experts like SERVPRO® can help detect and address mold problems early. Inspections should focus on high-moisture areas, including under refrigeration units, ventilation systems, and food prep surfaces.
6. Install Proper Ventilation Systems
A properly designed ventilation system can drastically reduce the risk of mold by removing excess moisture from the air. Ensure that your kitchen's exhaust systems are functioning optimally, and consider adding extra vents in areas that experience higher humidity levels.
Best Practices for Long-Term Mold Prevention
In addition to addressing mold risks, there are a few best practices that can help ensure long-term mold prevention in commercial kitchens:
- Keep Floors Dry: Standing water on kitchen floors is a major mold hazard. Train staff to promptly mop up spills and avoid leaving wet floors unattended.
- Clean Drains and Grease Traps: Regularly clean drains and grease traps to prevent the buildup of organic material that can contribute to mold growth.
- Store Food Properly: Ensure that food items are stored correctly in airtight containers and kept at the appropriate temperature to avoid moisture buildup that can encourage mold.
Why Choose SERVPRO for Mold Remediation?
When mold is already present in your commercial kitchen, professional remediation is essential. SERVPRO provides expert mold removal and remediation services, ensuring that your kitchen is restored to a safe and operational state. Our team of highly trained professionals uses advanced technology and techniques to remove mold, address underlying moisture issues, and ensure that your kitchen stays mold-free.
Conclusion
Mold in commercial kitchens poses several risks, from equipment damage to food contamination. By implementing expert mold prevention strategies, such as controlling humidity levels, fixing leaks, and ensuring proper ventilation, you can significantly reduce the likelihood of mold growth. Should you need professional mold remediation, SERVPRO is Here to Help® keep your kitchen safe, operational, and mold-free.
Don't let mold impact your commercial kitchen. Contact SERVPRO for expert mold prevention and remediation services today!
Is Your Home at Risk? How High Humidity Can Lead to Expensive Water Damage
9/18/2024 (Permalink)
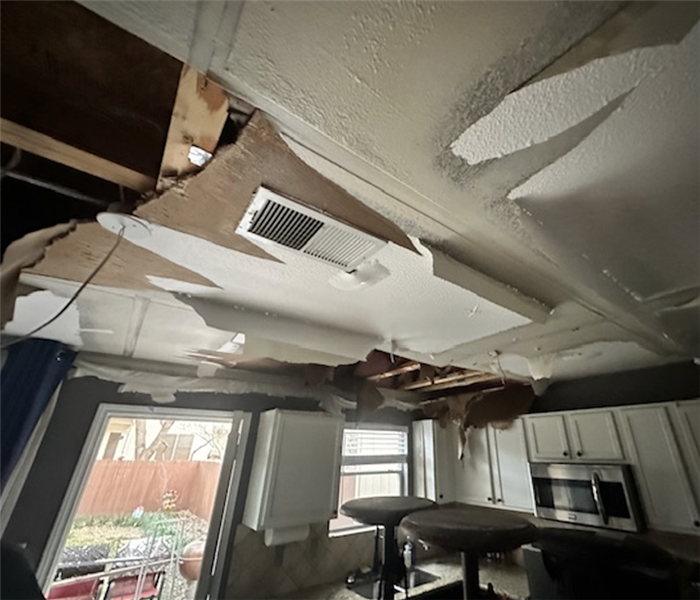 High humidity might seem like just another part of life in San Antonio, but it can seriously damage your home if you’re not careful.
If you live in San Antonio, TX, you know how sticky and uncomfortable high humidity can be. But did you know that it could be doing more than just making you sweat? High humidity can silently wreak havoc on your home, leading to serious water damage that can cost you big bucks. Let’s take a closer look at how high humidity can affect your home and what you can do to protect it.
The Sneaky Dangers of High Humidity
Humidity might seem like just another part of life in Texas, but when it’s consistently high, it can cause some real problems in your home. When the air is packed with moisture, it has a way of creeping into every corner, leading to condensation—and eventually, water damage.
How Humidity Turns into Water Damage
When warm, humid air hits cooler surfaces like your windows, walls, or pipes, condensation forms. Over time, this moisture can seep into walls and floors, causing them to weaken and break down. What starts as a little damp spot can turn into a big, expensive repair job.
Humidity and Mold: A Dangerous Duo
One of the worst things about high humidity is how it encourages mold growth. Mold loves damp, warm places, and if your home’s humidity is out of control, mold can take hold fast. Mold isn’t just gross—it can be expensive to deal with.
Structural Damage: The Hidden Threat
High humidity doesn’t just stop at surface problems—it can dig deep, affecting the very structure of your home. When wood, drywall, and even your foundation soak up moisture from the air, they can swell, warp, and eventually fall apart.
The Long-Term Financial Impact
If your home’s foundation starts to fail because of prolonged exposure to high humidity, you could be facing repair costs that climb into the tens of thousands. Keeping your home in good shape means keeping an eye on humidity levels.
How to Protect Your Home from High Humidity
The good news? You can take steps to keep humidity in check and protect your home from the damage it can cause. With a few simple changes, you can prevent high humidity from becoming a costly problem.
Use Dehumidifiers and Improve Ventilation
Dehumidifiers are your first line of defense, especially in moisture-prone areas like basements and bathrooms. Also, make sure your home is well-ventilated, particularly in places like the kitchen and laundry room where moisture tends to build up.
Stay on Top of Home Maintenance
Regularly check your home for signs of moisture, like condensation on windows or damp patches on walls. Catching these early can save you from bigger headaches down the road. Also, keep your gutters and downspouts clear to direct water away from your home.
Call in the Pros When Needed
If you suspect your home has water damage because of high humidity, don’t wait to get help. Professional water damage restoration services, like those offered by SERVPRO®, can step in to stop the damage and prevent it from getting worse.
Protect Your Home from High Humidity
High humidity might seem like just another part of life in San Antonio, but it can seriously damage your home if you’re not careful. By managing humidity levels and staying on top of maintenance, you can protect your home from expensive repairs. And if you ever find yourself dealing with water damage, SERVPRO of Northwest San Antonio is here to help get your home back in shape.
Comprehensive Guide: The Step-by-Step Process of Fire Damage Cleanup
8/14/2024 (Permalink)
 This blog outlines the detailed process of fire damage cleanup to help you understand what to expect and how to recover.
Experiencing a fire in San Antonio, TX, can be devastating, but understanding the fire damage cleanup process can help you navigate this challenging time. SERVPRO® is here to guide you through each step, ensuring your home is restored safely and efficiently. This blog outlines the detailed process of fire damage cleanup to help you understand what to expect and how to recover.
Initial Assessment and Safety Measures
Immediate Response
The first step in the fire damage cleanup process is to contact a professional restoration service like SERVPRO. Quick response is crucial to prevent further damage and ensure safety.
Safety First
Upon arrival, our team will conduct a thorough safety assessment to identify any potential hazards. This includes checking for structural damage, electrical hazards, and ensuring the property is safe to enter.
Detailed Inspection and Damage Assessment
Comprehensive Evaluation
Our experts will perform a detailed inspection to assess the extent of the fire, smoke, and soot damage. This evaluation helps us develop a tailored cleanup plan that addresses all affected areas.
Documentation
We will document the damage with photographs and detailed notes, which are essential for insurance claims and ensuring a smooth restoration process.
Water Removal and Drying
Water Extraction
Fires are often accompanied by water damage due to firefighting efforts. The next step is to remove any standing water using specialized equipment like pumps and vacuums.
Drying and Dehumidification
Once the water is removed, we will use industrial-grade dehumidifiers and air movers to dry out the affected areas. This step is crucial to prevent mold growth and further damage.
Soot and Smoke Removal
Cleaning and Sanitizing
Soot and smoke can leave behind stubborn stains and odors. Our team uses advanced cleaning techniques and products to remove soot from surfaces such as walls, ceilings, and furniture. We also sanitize the affected areas to ensure a clean and safe environment.
Air Purification
We employ air scrubbers and fogging equipment to eliminate smoke odor and improve air quality. This step is vital to restoring a healthy living environment.
Restoration and Repairs
Minor Repairs
Depending on the extent of the damage, we will perform minor repairs such as replacing drywall, painting, and installing new carpeting.
Major Reconstruction
For severe damage, our team is equipped to handle major reconstruction projects. This can include rebuilding entire rooms or structural elements to restore your home to its pre-fire condition.
Final Inspection and Quality Assurance
Thorough Inspection
After the cleanup and restoration are complete, we will conduct a final inspection to ensure all work meets our high standards of quality and safety.
Customer Satisfaction
Your satisfaction is our top priority. We will walk you through the restored areas, address any concerns, and ensure you are completely satisfied with our services.
Navigating the aftermath of a fire can be overwhelming, but with SERVPRO's step-by-step fire damage cleanup process, you can feel confident in restoring your home. Our professional team is dedicated to providing efficient, high-quality restoration services to help you recover quickly. Trust SERVPRO to bring your home back to life.
Mastering Post-Storm Cleanup: Debris and Fallen Trees
8/3/2024 (Permalink)
 At SERVPRO®, we understand the challenges that come with storm cleanup and are here to provide expert guidance.
When severe storms strike, they often leave behind a trail of debris and fallen trees. This aftermath can be overwhelming for homeowners and businesses alike. At SERVPRO®, we understand the challenges that come with storm cleanup and are here to provide expert guidance on how to manage the debris and fallen trees that follow effectively.
The Impact of Storm Debris and Fallen Trees
Storms can unleash powerful winds and heavy rains, causing trees to fall and debris to scatter across properties. This not only poses safety hazards but also can lead to significant property damage. In Texas, where storms can be particularly fierce, the aftermath is often daunting.
Fallen Trees in Texas: A Startling Statistic
In Texas, the frequency and intensity of storms contribute to a high number of fallen trees. According to the Texas A&M Forest Service, an estimated 5 million urban trees were damaged or destroyed by Hurricane Harvey alone. This statistic highlights the immense scale of the problem and the need for efficient cleanup strategies.
Immediate Steps for Safe Debris and Tree Cleanup
Cleaning up after a storm requires careful planning and execution to ensure safety and efficiency. Here are the crucial steps to follow:
- Assess the Damage Safely: Before beginning any cleanup, carefully assess the damage. Look for downed power lines, unstable trees, and other hazards. Keep a safe distance from any potential dangers.
- Use Proper Safety Gear: Equip yourself with the necessary safety gear, including gloves, safety goggles, and sturdy footwear. This will protect you from sharp debris and other hazards.
- Prioritize Hazardous Debris: Focus on removing hazardous debris first. This includes large branches, broken tree limbs, and any items blocking access to your property.
- Cut and Remove Fallen Trees: Use chainsaws and other appropriate tools to cut fallen trees into manageable pieces. If the job is too large or dangerous, consider hiring professional tree removal services.
- Clear Smaller Debris: Once the major hazards are addressed, clear smaller debris such as leaves, twigs, and branches. This can be done using rakes, brooms, and leaf blowers.
Long-Term Tree Management Strategies
To minimize future storm damage, implement these long-term tree management strategies:
- Regular Tree Maintenance: Regularly trim and prune trees to remove weak or dead branches that could pose a risk during storms.
- Tree Health Assessments: Periodically assess the health of your trees. Remove any diseased or damaged trees that could fall during severe weather.
- Proper Planting Practices: When planting new trees, choose species that are well-suited to your local climate and soil conditions. Plant trees a safe distance from structures and power lines.
Conclusion
The cleanup process after a storm in San Antonio, Texas, can be challenging, but with the right approach and professional assistance from SERVPRO, it becomes manageable. Understanding the impact of storm debris and fallen trees, taking immediate action, and implementing long-term strategies are essential for maintaining a safe and beautiful property. SERVPRO is Here to Help® you navigate through the post-storm cleanup with expertise and care, ensuring your property is restored efficiently and effectively.
Identifying Black Mold: What It Looks Like and How to Spot It
7/10/2024 (Permalink)
 We explore the appearance of black mold and provide tips on how to identify it in your home or business.
Black mold, also known as Stachybotrys chartarum, is a type of mold that can grow indoors under the right conditions. While the term "black mold" often evokes concern, it's essential to understand what black mold looks like and how to distinguish it from other types of mold. In this blog post, we'll explore the appearance of black mold and provide tips on how to identify it in your home or business.
Understanding Black Mold:
Appearance:
Black mold typically appears as slimy or powdery black spots on surfaces. It may also have a greenish-black or grayish-black hue. While the color can vary slightly depending on environmental factors, black mold is generally darker in appearance compared to other types of mold.
Texture:
Black mold often has a slimy or fuzzy texture when it's actively growing. However, as it ages or dries out, it may become powdery or crusty. The texture of black mold can vary depending on the surface it's growing on and the environmental conditions present.
Location:
Black mold thrives in areas with high humidity and moisture, such as bathrooms, kitchens, basements, and areas affected by water damage. It's commonly found on damp surfaces such as drywall, wood, carpeting, and ceiling tiles. Black mold can also grow on organic materials like paper and fabric if conditions are favorable.
Identifying Black Mold:
Visual Inspection:
Perform a visual inspection of your home or business to look for signs of black mold growth. Check areas prone to moisture buildup, such as around plumbing fixtures, under sinks, behind appliances, and in poorly ventilated spaces. Look for black spots or patches on surfaces and pay attention to any musty odors, which may indicate mold growth.
Testing:
If you suspect black mold but are unsure, consider conducting mold testing to confirm its presence. Mold testing involves collecting air or surface samples from suspected areas and analyzing them in a laboratory for the presence of mold spores. Professional mold testing can provide definitive results and help guide remediation efforts if black mold is detected.
If you encounter black mold in your home or business, it's essential to seek professional assistance for proper identification and remediation. Professional mold remediation companies like SERVPRO® have the expertise and equipment to safely remove black mold and restore the affected area to a clean and healthy condition.
Identifying black mold requires a keen eye and an understanding of its appearance and characteristics. By knowing what black mold looks like and where it's likely to grow, homeowners and business owners can take proactive measures to address mold issues and maintain a healthy indoor environment. If you suspect black mold in your home or business, don't hesitate to contact a professional restoration company like SERVPRO for expert assistance in mold identification and remediation.
Water Damage Preparedness for Home-Based Businesses
6/10/2024 (Permalink)
Running a home-based business can be a rewarding experience, offering flexibility and convenience. However, as a home-based entrepreneur, it's crucial to prepare for potential risks, including water damage. Water-related issues can disrupt your business operations and cause financial losses. In this blog, we’ll cover strategies to help you protect your home-based business from water damage and minimize its impact on your work.
1. Assess Water Damage Risks
The first step in water damage preparedness is identifying the risks specific to your business and home. Common risks include plumbing leaks, flooding, burst pipes, and appliance malfunctions. Assess your workspace for vulnerabilities and address them as needed.
2. Have a Water Damage Response Plan
Create a water damage response plan that outlines how you will handle various scenarios. Include steps such as turning off water and electricity supplies, relocating essential equipment, and contacting restoration services. Practice your plan regularly so you know exactly what to do in an emergency.
3. Protect Equipment and Documents
Your business equipment and important documents are valuable assets. Store these items off the ground and in waterproof containers when possible. Consider investing in a water-resistant safe for critical files and backup important data digitally in a secure cloud-based service.
4. Install Water Detection Devices
Water detection devices can alert you to leaks or flooding early, allowing you to take action before the damage worsens. Place these devices in areas prone to water damage, such as basements, laundry rooms, or near appliances.
5. Maintain Your Home's Plumbing and Drainage Systems
Regular maintenance of your home's plumbing and drainage systems can help prevent leaks and water backup. Inspect pipes and drains for signs of wear and tear and address any issues promptly. Regularly clean gutters and downspouts to prevent water from pooling near your home.
6. Keep Emergency Supplies Handy
Prepare an emergency kit with essentials such as flashlights, a first aid kit, batteries, and a supply of water and non-perishable food. In the event of severe water damage, you may need to evacuate your home temporarily, and these supplies will come in handy.
7. Review Your Insurance Coverage
Ensure your homeowner's insurance policy includes coverage for water damage related to plumbing issues, flooding, or other water-related incidents. If necessary, consider adding additional coverage to protect your home-based business assets.
8. Secure Business Disruptions Coverage
In addition to insurance for property damage, look into business interruption insurance. This type of coverage can help replace lost income if your business operations are interrupted due to water damage or other covered events.
9. Keep Clients and Employees Informed
Communicate with your clients and employees about your water damage preparedness plan. Let them know how you will handle business disruptions and what to expect if a water-related emergency occurs. This will help maintain trust and minimize confusion during challenging times.
Stay informed about local weather forecasts, especially during storm seasons. Knowing what to expect can help you take proactive measures to protect your business from potential water damage. By following these preparedness strategies, you can safeguard your home-based business from the effects of water damage. Taking preventive measures and having a plan in place will help you navigate potential emergencies and minimize disruptions to your business operations.
Be Ready, Stay Safe: Creating Your Storm Survival Kit
5/28/2024 (Permalink)
When storms loom on the horizon, being prepared can make all the difference between weathering the storm safely and facing unforeseen challenges. A well-equipped storm survival kit is a crucial component of emergency preparedness, providing essential supplies to help you and your loved ones stay safe and comfortable during and after a storm. Let's explore how to create a comprehensive storm survival kit to ensure you're ready for whatever Mother Nature throws your way.
Water and Hydration
Water is essential for survival, so ensure your kit includes an ample supply. Aim for at least one gallon of water per person per day for drinking and sanitation purposes. Consider adding water purification tablets or a portable water filter for additional purification options.
Stock up on non-perishable food items that require minimal preparation and can be eaten without cooking. Include items such as canned goods, protein bars, dried fruits, nuts, and granola bars. Choose foods with a long shelf life and rotate them periodically to maintain freshness.
First Aid Kit & Lighting
A well-stocked first aid kit is essential for treating minor injuries and medical emergencies. Include bandages, gauze pads, adhesive tape, antiseptic wipes, pain relievers, tweezers, scissors, and any necessary prescription medications. Familiarize yourself with basic first aid procedures and keep a manual or guide book handy.
In the event of a power outage, reliable lighting sources are essential for navigating darkened spaces safely. Pack flashlights, headlamps, lanterns, and spare batteries to ensure you have ample illumination. Consider including glow sticks or candles with matches as backup options.
Communication Devices & Shelter
Maintain communication with loved ones and emergency services by including communication devices in your kit. Pack a battery-powered or hand-crank radio to receive emergency alerts and updates. Don't forget to include a fully charged mobile phone with a portable charger or backup battery.
Be prepared for inclement weather by including items to keep warm and sheltered. Pack warm blankets, sleeping bags, or emergency thermal blankets to retain body heat. Additionally, include waterproof ponchos, tarps, or emergency shelters to protect against rain and wind.
Tools and Multi-Purpose Items
Equip your kit with a selection of versatile tools and multi-purpose items to address various needs. Consider including a multi-tool, duct tape, rope, utility knife, whistle, and matches or a lighter. These items can prove invaluable in a wide range of situations.
Maintain hygiene and sanitation standards even in emergency situations by including personal hygiene items in your kit. Pack items such as hand sanitizer, moist towelettes, toilet paper, feminine hygiene products, and disposable gloves. Don't forget to include a small shovel or trowel for waste disposal.
Important Documents and Cash
Safeguard essential documents and valuable items by storing copies in your kit. Include photocopies of identification, insurance policies, medical records, and emergency contact information. Keep cash in small denominations for purchasing supplies or accessing services if electronic payment methods are unavailable.
While safety is paramount, maintaining morale during stressful situations is also important. Include items to keep spirits up and provide entertainment. Pack books, playing cards, puzzles, or other small games to pass the time and distract from the storm's intensity.
By assembling a comprehensive storm survival kit and regularly reviewing its contents, you can be better prepared to face the challenges of severe weather events. Remember to customize your kit based on your family's unique needs and preferences and store it in a readily accessible location. With proper preparation and foresight, you can enhance your resilience and readiness for whatever storms may come your way.
Clearing the Air: Harnessing the Power of Ozone Treatments to Eradicate Smoke Odor
4/17/2024 (Permalink)
Smoke odor is not only persistent but can also be a constant reminder of past fire incidents. While tackling this challenge might seem daunting, ozone treatments emerge as a powerful solution in the restoration toolkit. In this blog, we'll explore the effectiveness and considerations of using ozone treatments to eliminate smoke odor.
Understanding Ozone: A Natural Purifier
Ozone, a molecule composed of three oxygen atoms, serves as a natural purifier in the Earth's atmosphere. This characteristic is harnessed in controlled environments to neutralize and eliminate stubborn odors, particularly those left behind by smoke. Ozone treatments involve the introduction of ozone molecules into the affected space, initiating a process that breaks down odor-causing compounds and leaves behind a fresher environment.
How Ozone Treatments Work
Oxidation of Odor Molecules:
- Ozone treatments work by oxidizing the molecules responsible for smoke odor. Ozone reacts with these compounds, altering their chemical structure and neutralizing the unpleasant smell.
- Penetration into Pores and Fabrics:
- Ozone has the ability to penetrate porous materials and fabrics, reaching areas that might be challenging for traditional cleaning methods. This comprehensive coverage ensures that even hidden sources of smoke odor are addressed.
- Elimination of Lingering Odors:
- Unlike masking agents that temporarily cover up odors, ozone treatments aim to eliminate the source of the smell. This results in a longer-lasting and more effective solution to smoke odor removal.
- Non-Residual Process:
- Ozone treatments leave no chemical residues behind. Once the treatment is complete, the ozone naturally reverts to oxygen, leaving the treated space fresh and odor-free.
Considerations for Ozone Treatments
- Professional Expertise:
- Ozone treatments should be conducted by trained professionals with expertise in restoration. Proper equipment and knowledge are essential to ensure safe and effective application.
- Vacate the Treated Space:
- During ozone treatments, occupants and pets should vacate the treated space. Ozone can cause respiratory irritation, and safety precautions are necessary to minimize exposure.
- Duration of Treatment:
- The duration of ozone treatments depends on the severity of the smoke odor. Professional assessments guide the appropriate length of treatment to achieve optimal results.
- Post-Treatment Ventilation:
- After ozone treatments, thorough ventilation is crucial. Allowing fresh air to circulate helps dissipate any remaining ozone and ensures a safe environment for reoccupation.
Ozone treatments stand as a powerful and non-intrusive method for eliminating smoke odor. By leveraging the natural oxidizing properties of ozone, restoration professionals can provide clients with a lasting solution to a challenging problem. As with any restoration technique, it is imperative to engage the services of experienced professionals who understand the intricacies of ozone treatments, ensuring a successful outcome and a breath of fresh air for spaces plagued by persistent smoke odors.


 24/7 Emergency Service


