Recent Mold Remediation Posts
Mold in Commercial Kitchens: Expert Insights on Risks and Solutions from SERVPRO®
11/13/2024 (Permalink)
 We dive into the key risks of mold growth in commercial kitchens and provide expert solutions to help you keep your kitchen clean and mold-free.
Mold in commercial kitchens in San Antonio, TX, is not only an inconvenience, but it also poses serious risks to the business's reputation and operational efficiency. Kitchens, especially commercial ones, often have the ideal conditions for mold to thrive: moisture, warmth, and food residues. To prevent disruptions and potential long-term damage, understanding the risks of mold in a commercial kitchen and learning how to prevent it is crucial.
In this blog, we’ll dive into the key risks of mold growth in commercial kitchens and provide expert solutions to help you keep your kitchen clean, safe, and mold-free.
The Prevalence of Mold in Commercial Kitchens
Mold can develop quickly in environments where moisture is abundant, and kitchens are particularly vulnerable due to regular water use, humidity, and food waste. According to a report from the International Association for Food Protection (IAFP), over 25% of food service establishments experience mold growth at some point. This statistic highlights the importance of mold prevention in commercial kitchens.
Risks of Mold in Commercial Kitchens
While mold in a commercial kitchen might seem like just a cleanliness issue, it can lead to serious risks that impact the business in multiple ways:
1. Damage to Equipment and Infrastructure
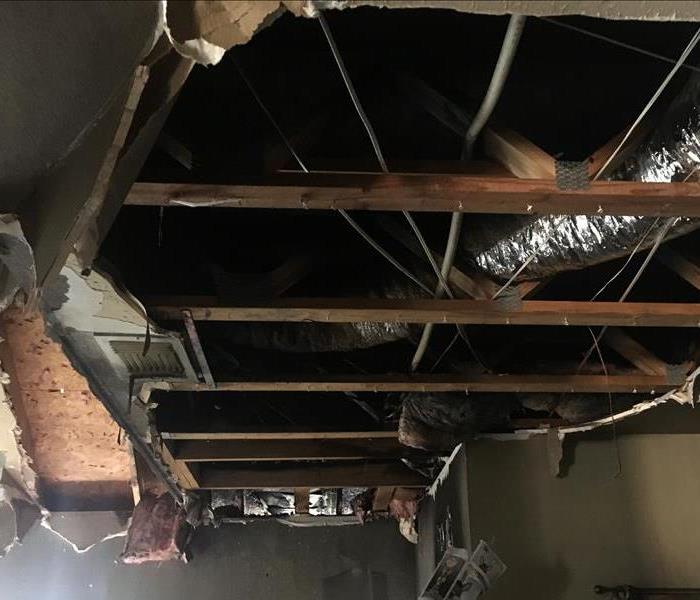
Mold can cause significant damage to kitchen equipment, ceilings, walls, and flooring. It grows in moist areas, so places like sink areas, under refrigeration units, and behind walls where pipes run are at higher risk. Over time, mold can deteriorate structural materials, requiring costly repairs or replacements.
2. Contamination of Food Supplies
One of the biggest risks of mold in a commercial kitchen is the potential for food contamination. Mold spores can easily spread through the air, and if they land on food preparation areas or equipment, there is a heightened risk of cross-contamination. This can result in wasted inventory, increased costs, and operational downtime.
3. Increased Operational Costs
Addressing mold once it has spread can lead to increased operational costs. The cleanup process can be time-consuming, require specialized equipment, and, in some cases, lead to the temporary closure of the kitchen. Regular mold inspections and prevention measures can help reduce these unexpected costs.
Expert Solutions for Mold Prevention in Commercial Kitchens
Preventing mold in commercial kitchens requires a combination of proactive maintenance, routine cleaning, and proper ventilation. Here are some expert solutions for keeping your kitchen mold-free:
1. Control Humidity Levels
High humidity is one of the main factors that contribute to mold growth. To combat this, install dehumidifiers or ensure proper ventilation, especially in areas where moisture tends to accumulate, such as near dishwashing stations or under refrigeration units. Keeping humidity levels below 60% is ideal for preventing mold growth.
2. Fix Leaks Immediately
Even small leaks can create the perfect environment for mold to thrive. Regularly inspect plumbing under sinks, around water fixtures, and near refrigeration units for signs of leaks. Addressing leaks as soon as they are detected will help prevent moisture from spreading to hidden areas.
3. Clean Hard-to-Reach Areas Regularly
Certain areas in commercial kitchens are more prone to mold growth due to limited access during routine cleaning. Areas behind equipment, under sinks, and ventilation ducts are some of the most common places where mold can grow unnoticed. Schedule deep cleaning sessions to ensure these areas are cleaned and inspected regularly.
4. Use Mold-Resistant Materials
When building or renovating a commercial kitchen, consider using mold-resistant materials, such as moisture-resistant drywall, mold-inhibiting paint, or stainless steel surfaces. These materials not only prevent mold growth but also make routine cleaning easier and more effective.
5. Implement a Regular Inspection Schedule
Regular inspections by professional mold remediation experts like SERVPRO® can help detect and address mold problems early. Inspections should focus on high-moisture areas, including under refrigeration units, ventilation systems, and food prep surfaces.
6. Install Proper Ventilation Systems
A properly designed ventilation system can drastically reduce the risk of mold by removing excess moisture from the air. Ensure that your kitchen's exhaust systems are functioning optimally, and consider adding extra vents in areas that experience higher humidity levels.
Best Practices for Long-Term Mold Prevention
In addition to addressing mold risks, there are a few best practices that can help ensure long-term mold prevention in commercial kitchens:
- Keep Floors Dry: Standing water on kitchen floors is a major mold hazard. Train staff to promptly mop up spills and avoid leaving wet floors unattended.
- Clean Drains and Grease Traps: Regularly clean drains and grease traps to prevent the buildup of organic material that can contribute to mold growth.
- Store Food Properly: Ensure that food items are stored correctly in airtight containers and kept at the appropriate temperature to avoid moisture buildup that can encourage mold.
Why Choose SERVPRO for Mold Remediation?
When mold is already present in your commercial kitchen, professional remediation is essential. SERVPRO provides expert mold removal and remediation services, ensuring that your kitchen is restored to a safe and operational state. Our team of highly trained professionals uses advanced technology and techniques to remove mold, address underlying moisture issues, and ensure that your kitchen stays mold-free.
Conclusion
Mold in commercial kitchens poses several risks, from equipment damage to food contamination. By implementing expert mold prevention strategies, such as controlling humidity levels, fixing leaks, and ensuring proper ventilation, you can significantly reduce the likelihood of mold growth. Should you need professional mold remediation, SERVPRO is Here to Help® keep your kitchen safe, operational, and mold-free.
Don't let mold impact your commercial kitchen. Contact SERVPRO for expert mold prevention and remediation services today!
Identifying Black Mold: What It Looks Like and How to Spot It
7/10/2024 (Permalink)
 We explore the appearance of black mold and provide tips on how to identify it in your home or business.
Black mold, also known as Stachybotrys chartarum, is a type of mold that can grow indoors under the right conditions. While the term "black mold" often evokes concern, it's essential to understand what black mold looks like and how to distinguish it from other types of mold. In this blog post, we'll explore the appearance of black mold and provide tips on how to identify it in your home or business.
Understanding Black Mold:
Appearance:
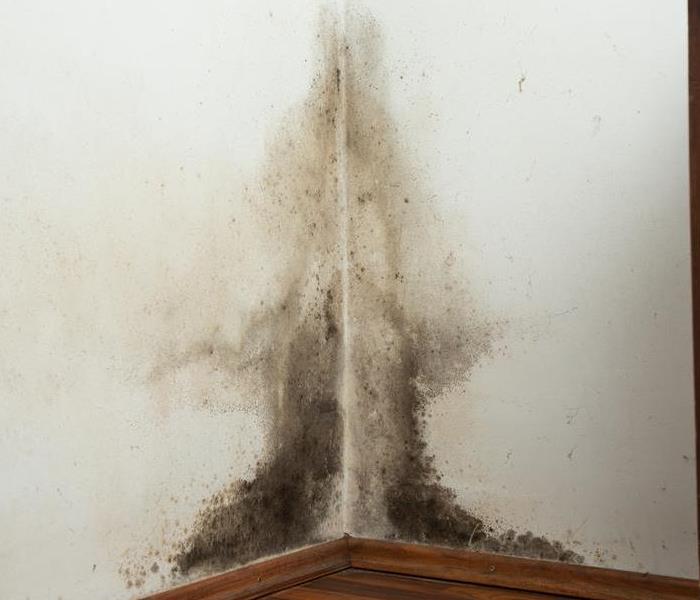
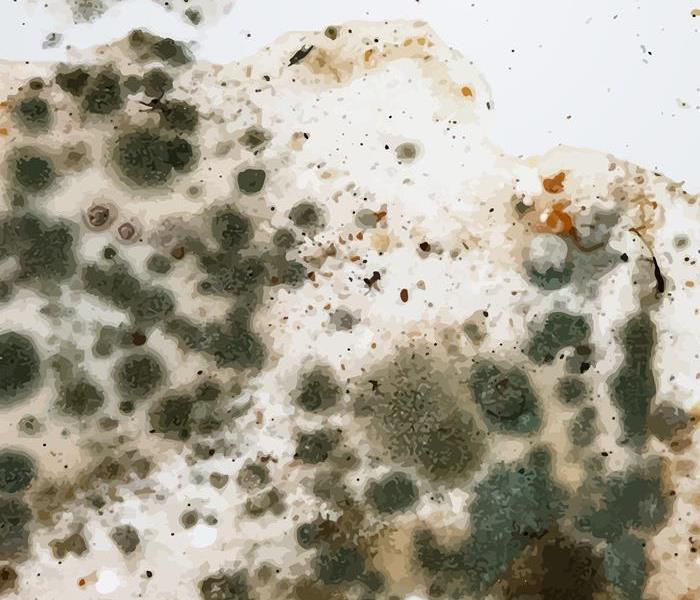
Black mold typically appears as slimy or powdery black spots on surfaces. It may also have a greenish-black or grayish-black hue. While the color can vary slightly depending on environmental factors, black mold is generally darker in appearance compared to other types of mold.
Texture:
Black mold often has a slimy or fuzzy texture when it's actively growing. However, as it ages or dries out, it may become powdery or crusty. The texture of black mold can vary depending on the surface it's growing on and the environmental conditions present.
Location:
Black mold thrives in areas with high humidity and moisture, such as bathrooms, kitchens, basements, and areas affected by water damage. It's commonly found on damp surfaces such as drywall, wood, carpeting, and ceiling tiles. Black mold can also grow on organic materials like paper and fabric if conditions are favorable.
Identifying Black Mold:
Visual Inspection:
Perform a visual inspection of your home or business to look for signs of black mold growth. Check areas prone to moisture buildup, such as around plumbing fixtures, under sinks, behind appliances, and in poorly ventilated spaces. Look for black spots or patches on surfaces and pay attention to any musty odors, which may indicate mold growth.
Testing:
If you suspect black mold but are unsure, consider conducting mold testing to confirm its presence. Mold testing involves collecting air or surface samples from suspected areas and analyzing them in a laboratory for the presence of mold spores. Professional mold testing can provide definitive results and help guide remediation efforts if black mold is detected.
If you encounter black mold in your home or business, it's essential to seek professional assistance for proper identification and remediation. Professional mold remediation companies like SERVPRO® have the expertise and equipment to safely remove black mold and restore the affected area to a clean and healthy condition.
Identifying black mold requires a keen eye and an understanding of its appearance and characteristics. By knowing what black mold looks like and where it's likely to grow, homeowners and business owners can take proactive measures to address mold issues and maintain a healthy indoor environment. If you suspect black mold in your home or business, don't hesitate to contact a professional restoration company like SERVPRO for expert assistance in mold identification and remediation.
The Silent Intruder: Understanding Mold Development in a Leaking Roof
3/6/2024 (Permalink)
A leaking roof is more than a structural concern; it opens the door to potential mold growth, silently infiltrating your home. In this blog, we'll explore the timeline of mold development in the aftermath of a leaking roof.
The Initial Impact
When a roof begins to leak, the process of mold development is set in motion. While mold spores are present in the environment, their activation and growth depend on the availability of moisture, a key factor introduced by a leaking roof.
Immediate Consequences
Day 1-2:
In the initial days following a roof leak, the affected materials, such as insulation, ceiling tiles, and wooden structures, absorb moisture. While visible mold may not be apparent, the conditions for mold growth are established.
Day 2-7:
As the days pass, the moisture content in affected materials increases. Mold spores, present in the air and on surfaces, react to the moisture, and the germination process begins. However, visible mold growth may not yet be noticeable.
Visible Mold Growth
Day 7-14:
Within the first two weeks, if the leaking persists, you may start to observe visible signs of mold growth. This can manifest as discoloration on walls and ceilings, often appearing as dark spots or patches.
Established Mold Colonies
Day 14-30:
Beyond the initial two weeks, if the leaking roof persists, mold colonies become more established. The growth may accelerate, especially in materials with high cellulose content, such as drywall and wood.
Day 30 and Beyond
Continued exposure to moisture due to a leaking roof creates an environment conducive to sustained mold growth. The mold colonies may spread across surfaces and materials, leading to more extensive damage.
Prevention and Intervention:
Upon Discovery
Identifying a leaking roof promptly is crucial to preventing extensive mold growth. Once the leak is addressed, immediate action is necessary to dry and remediate affected materials.
Engage the services of professionals with expertise in water damage and mold remediation. They can assess the extent of the damage, address the root cause of the leak, and implement effective remediation measures.
The timeline of mold development in a leaking roof underscores the importance of swift action. Addressing roof leaks promptly and intervening in the early stages of mold growth are key to minimizing the impact on your home. By understanding the progression of mold development and enlisting professional assistance, you can safeguard your property from the silent intruder that thrives in the wake of water intrusion.
A Step-by-Step Guide to Removing Mold Stains from Clothing and Fabrics
11/9/2023 (Permalink)
 Follow step by step guides to prevent your belongings from mold damage.
Discovering mold stains on your favorite clothing or fabrics can be disheartening. In this blog, we will provide a step-by-step guide to removing mold stains. By following these simple techniques, you can rescue your garments and fabrics and restore them to their original condition.
Safety Precautions
Before beginning the removal process, it's important to take necessary safety precautions. As mold stains are visible signs of mold growth, ensure you handle the affected materials in a well-ventilated area to prevent the spread of spores. Wear gloves and a face mask as a precautionary measure. Remember, the focus here is solely on stain removal, not addressing any potential health risks.
Dry Brushing or Vacuuming
Start by gently dry brushing or using a vacuum cleaner with a brush attachment to remove loose mold spores from the surface of the fabric. Always perform this step outside or in a well-ventilated area to prevent spores from dispersing indoors. Be cautious not to press too hard as it may force mold spores deeper into the fabric.
Pre-Treat the Stains
To pre-treat the mold stains, create a solution by mixing equal parts of white vinegar and water. Apply the solution directly to the stained areas and gently scrub with a clean cloth or soft-bristled brush. Let the solution sit for about 15 minutes before moving on to the next step.
Laundering the Garments or Fabrics
After pre-treating the stains, launder the garments or fabrics as usual. Add a cup of vinegar to the wash cycle to further assist in stain removal. Use the appropriate water temperature and recommended laundry detergent for the fabric. If possible, hang the items out to dry in the sunlight, as the sun's natural bleaching effect can help eliminate residual stains.
Assessing and Repeating the Process
Once the garments or fabrics have gone through the wash, carefully inspect them for any remaining mold stains. If any spots persist, repeat the pre-treatment step and wash them again. It may be necessary to repeat the process a few times for stubborn stains. Avoid drying the items until the stains are completely gone, as heat can set the stains and make them more difficult to remove.
Preventive Tips to Avoid Mold Stains on Clothing and Fabrics
To minimize the chances of mold stains appearing on your clothing and fabrics in the first place, it's important to take preventive measures. Ensure proper ventilation in storage areas and avoid storing damp or wet clothes. Keep your wardrobe and storage spaces clean and dry, and periodically inspect garments for any signs of moisture or mold. If you live in an area with high humidity, consider using dehumidifiers or moisture-absorbing products to maintain optimal conditions for your fabrics.
By following this step-by-step guide to removing mold stains from clothing and fabrics, you can restore your items back to pre mold condition. Remember to approach this as a stain removal process only, and take preventive measures to ensure your clothes and fabrics remain mold-free in the future.
Effective Ways to Clean Up Small Amounts of Mold in Your Home
5/30/2023 (Permalink)
 If you have a large amount of mold or if it keeps coming back, call a professional for help.
Mold is a common problem that homeowners face, especially in areas with high humidity. If left untreated, it can cause significant damage to your home or business. In this blog, we will discuss how to clean up small amounts of mold in your house.
Identify the Mold
The first step in cleaning up mold is to identify the type of mold you have in your home. Mold can be black, green, or white and can grow in various areas such as the bathroom, kitchen, or basement. Once you have identified the mold, you can then proceed to clean it up.
Gather Your Supplies
Before you start cleaning up the mold, it is essential to gather your supplies. You will need a scrub brush, a bucket, a sponge, and a cleaning solution. You can create a cleaning solution by mixing one part vinegar with three parts water or by using a commercial mold cleaner.
Protect Yourself
When cleaning up mold, it is crucial to protect yourself. Wear gloves, a mask, and goggles to prevent the mold from getting into your eyes or lungs. You should also open the windows to allow for proper ventilation.
Scrub the Mold
To clean up small amounts of mold, use a scrub brush or a sponge and apply the cleaning solution. Scrub the affected area thoroughly, making sure to remove all the mold. Rinse the area with water and then dry it with a clean towel.
Prevent Mold Growth
To prevent mold from growing again, it is important to keep your home dry and well-ventilated. Fix any leaks or moisture problems, and use a dehumidifier in areas with high humidity. Regularly clean your home, especially areas such as the bathroom and kitchen.
Call a Professional
If you have a large amount of mold in your home or if it keeps coming back, it is best to call a professional, such as our SERVPRO of Northwest San Antonio team. They can help identify the source of the mold and provide a more thorough cleaning.
Why Cleaning Up Small Amounts of Mold in Your Home is Important
By identifying the mold, gathering your supplies, protecting yourself, and scrubbing the mold, you can effectively remove it from your home. To prevent mold growth, keep your home dry and well-ventilated, and regularly clean it. If you have a large amount of mold or if it keeps coming back, call a professional for help.
 We dive into the key risks of mold growth in commercial kitchens and provide expert solutions to help you keep your kitchen clean and mold-free.


 24/7 Emergency Service


